Description: Learn how to create sections, build table layouts, and add labels in the Shift4 Dine Customer Hub.
Jump to a section by selecting a link below:
To watch more how-to videos, visit our video section.
Important: Shift4 Dine is not capable of configuring table layout on the Workstation directly; this must be done via the Customer Hub.
Navigation to Table Layout Configuration
Log in to the Customer Hub, and go to Shift4 Dine > Table Layout from the left navigation panel.
This opens the Table Layout Builder, where you can configure sections, tables, and labels for your restaurant's floor plan. To see how these layouts appear to staff during service, visit the Understand the Table View article.
Sections
If you have a large dining area, setting up sections helps organize tables more efficiently.
Viewing and Navigating Sections
Use the Sections dropdown to switch between layouts for different areas of your restaurant.
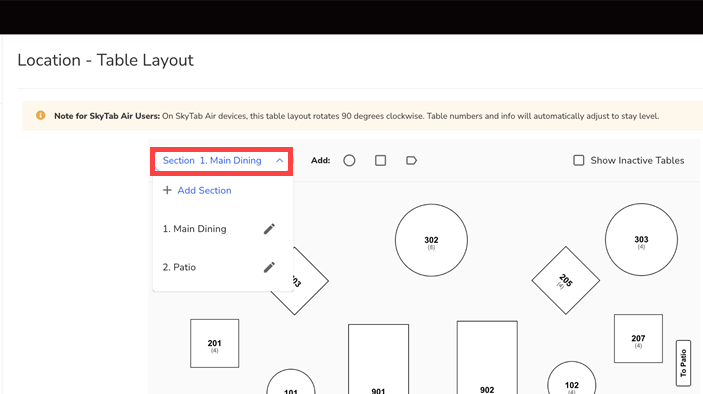
Adding or Editing Sections
- Select Add Section from the Section dropdown to create a new section and name it.
- To rename a section, select the pencil icon next to the section name.
- To inactivate a section, ensure no table is selected. The Section Settings panel will appear. Uncheck "Section is Active" to deactivate it.
Tables
Tables can be added and customized directly within the layout.
Adding Tables
To add a table, select a table shape (round or rectangular).
Each new table is automatically numbered incrementally and staggered on the layout.
To help with alignment while building your layout:
- Snap to Grid is ON by default
- Show Grid Lines is ON by default
These settings make it easier to keep tables evenly spaced and visually consistent.
Editing Tables
Selecting a table opens the Edit panel, where you can modify:
- Table Name/Number: Customize as needed
- Seats: Set the maximum number of seats
- Shape: Change the table shape between circle and rectangle, or convert the table into a label
- Size: Adjust the table size using the plus (+) or minus (–) controls.
- Rotation: Rotate rectangular tables using the plus (+) or minus (–) controls.
Duplicating Tables
The Table Layout Builder also provides quick actions to help you reuse table attributes:
- Duplicate: Create a copy of the selected table with all the same attributes by selecting Duplicate at the bottom of the screen.
- Undo: Revert any unsaved changes by selecting the Undo button.
Resizing Tables
The Table Layout Builder allows you to adjust table dimensions directly in the editor:
- Rectangular tables: Adjust width, height, and rotation
- Round tables: Adjust radius
- Numeric size values appear for both round and rectangular tables, making it easier to size tables accurately.
Inactivating Tables
You can hide tables from active use without deleting them:
- Select the table.
- In the Edit panel, uncheck Table is Active.
Showing Inactive Tables
Inactive tables are hidden by default.
To display inactive tables, check the Show Inactive Tables checkbox at the top of the layout builder.
Labels
Labels appear as blue banners and can be placed anywhere on the layout.
To add a label, select the label icon at the top. After placing the label, the Edit panel appears on the right, where you can modify the label name, adjust rotation, or change the label's shape to convert it into a circular or rectangular table if needed.
Common uses include:
- Marking closed sections
- Displaying reserved areas
- Identifying non-table items (e.g., host stand, bar area)
Saving Your Layout
Be sure to select Save to retain all updates to your table layout, sections, and labels.
Comments
0 comments
Please sign in to leave a comment.